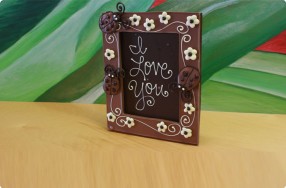
Chocolate Picture Frame
Ingredients
- good-quality chocolate: dark, milk & white, chopped
Special Equipment
- double-boiler or microwave-safe bowl
- chocolate candy thermometer
- baking sheet
- parchment paper
- laminated paper
- cloth or plastic gloves
- piping bags
Tempering Chocolate - Double-Broiler Method
- Bring saucepan filled with 1" of water to a simmer over low heat
- Place heat-proof bowl or double-boiler insert over a saucepan of simmering water
- Place ¾ of chocolate in bowl. Melt slowly, allowing temperature to reach 110º F
- Remove from heat and add back the remaining ¼ of chocolate gradually, to drop temperature down to following ranges, and keep over very low heat at these temperatures (tempered chocolate will cool and harden quickly): dark chocolate: 88-90º F; milk chocol
Tempering Chocolate - Microwave Method
- Place ¾ of chocolate in microwave-safe bowl. Microwave at 30-second intervals, stirring after each time. When chocolate starts to melt, check temperature with chocolate thermometer (or candy thermometer) to reach 110º F
- Stir in a small amount of reserved chocolate, until temperature drops to following ranges, and keep at these temperatures until use (tempered chocolate will harden quickly). Microwave at 10-second intervals to bring back up to temperature. Add small amoun
How-to
Trace & Separate Chocolate Pieces
- Spread tempered* Milk Chocolate over a parchment paper-lined baking sheet. (Set aside some of the Milk Chocolate for decorating). Be sure to get air bubbles out, smoothing the chocolate with a spatula and carefully lifting the pan and giving it a tap on the tabletop
- Wait until just before the Milk Chocolate gets hard, yet still slightly soft, then it will be ready to trace the frame shape
- Measure the size picture frame desired on a thick piece of paper, cut out the shape. Lay laminated paper over the frame
- Gently lay frame over the milk chocolate. Do not press hard on the chocolate because it will leave fingerprints
- With a paring knife, first trace the outer edge of the frame; next, trace the inner edge of the frame. Then gently insert the knife under a corner of the template; lift and gently pull off template
- With the knife, outline triangles in the center "canvas" area of the frame to make it easier to pop out the chocolate
- Once these steps are completed, let chocolate completely harden for about 5 minutes. The surrounding chocolate will actually start to separate from the frame which indicates it's hard enough to remove
- Wearing gloves (to avoid fingerprints), gently remove chocolate triangles from within the frame and the chocolate from around the frame itself. (Melt extra pieces of chocolate to use or enjoy them as a reward for a job well done!)
- Complete the steps above with Dark Chocolate (set aside some dark chocolate for decorating) except do not cut triangles in the center. This will be the surface or "canvas" that shows through the Milk Chocolate Frame on which to write a message
- Also cut out a few triangular "stands" from the Dark Chocolate to support the frame
Assemble Frame
- Melt reserved Dark Chocolate and put in a piping bag and outline the edges of the Dark Chocolate canvas
- Place Milk Chocolate frame on top, and press gently
Decorate & Attach Stand
- Melt chocolate as per tempering instructions and write a message on the inside "canvas" portion of the frame
- Make decorations and let harden, about 3-5 minutes, before adding to frame
- Attach decorations to the frame on a flat surface, using melted chocolate as "glue"
- Let dry 3-5 minutes before attaching stand onto the back of the frame
- Attach stand to the frame with melted chocolate piped onto the individual stand pieces
- Press gently into the stand and pipe extra chocolate on the outside edges of the stand pieces
- Let stand, untouched for 10 minutes before moving